
By MAZ Outdoor · Buyer guide · September 29, 2026
Custom tote bag design starts with what the bag must carry and how the customer will carry it. Define the contents first, then confirm finished dimensions, opening size, handle drop, pocket layout and closure on a physical sample. Material and branding choices should support those decisions. A good-looking mockup alone cannot show whether a laptop passes through the opening or whether the handles are comfortable over a coat.
For retail brands, corporate buyers and private label collections, the most useful brief describes everyday tasks rather than a list of extra features. This guide helps you turn those tasks into specifications a supplier can review and a buyer can approve.
Start with a carry scenario, not a standard size
Write down the essential contents and the intended carrying method. An event tote holding printed materials has a different job from a work bag carrying a laptop, charger, bottle and personal items. Use actual objects or measured substitutes when reviewing the sample. Include any sleeve, case or packaging that will travel inside the bag.
Separate requirements into essential, optional and unnecessary. For example, a secure internal pocket may be essential for a commuter bag, while several external pockets may add complexity without helping the intended user. If a feature has no clear purpose, leave it out of the first sample brief and reconsider it after the basic layout works.
Browse the handbag and tote collection to identify a starting silhouette. State which parts of the reference you want to preserve and which parts need development.
Which tote bag dimensions should you specify?
Specify finished width, height and depth, with units and a measurement sketch. State whether width is measured at the top opening, across the base or with the bag laid flat. These measurements may differ on a tapered or gusseted tote. Also record the usable opening width and any internal compartment dimensions that matter to the contents.
A gusset is the panel or fold that gives the bag depth. It can help accommodate bulky contents, but its dimensions alone do not establish usable capacity. Seams, lining, padding, closures and internal divisions all occupy space. Avoid calculating a precise capacity from exterior dimensions and presenting it as a verified product specification.
For a laptop tote, measure the actual device with its sleeve instead of relying only on the screen-size label. Ask the supplier to confirm internal compartment dimensions and check insertion and removal on the sample. Specify the desired padding separately; fitting a device does not demonstrate impact protection.
How do handle length and handle drop differ?
Handle length describes the handle itself; handle drop describes the clearance between the bag opening and the top of the handle when held up. Two handles with the same total length can produce different drops because attachment positions and construction differ. Ask for both the measurement definition and the finished value.
Choose the handle arrangement around hand carry, shoulder carry or both. Review clearance with the clothing the customer is likely to wear. Then try the sample with the intended contents: the bag position and handle feel can change once it is loaded. Do not select a handle only from an unloaded photograph.
Discuss handle width, thickness, edge finish and attachment with the supplier. A wider handle is not an automatic comfort or strength guarantee. The material, load, construction and user all matter. If a carrying-load claim is required, agree on the relevant evaluation and evidence before using that claim in product copy.
Choose pockets by access needs
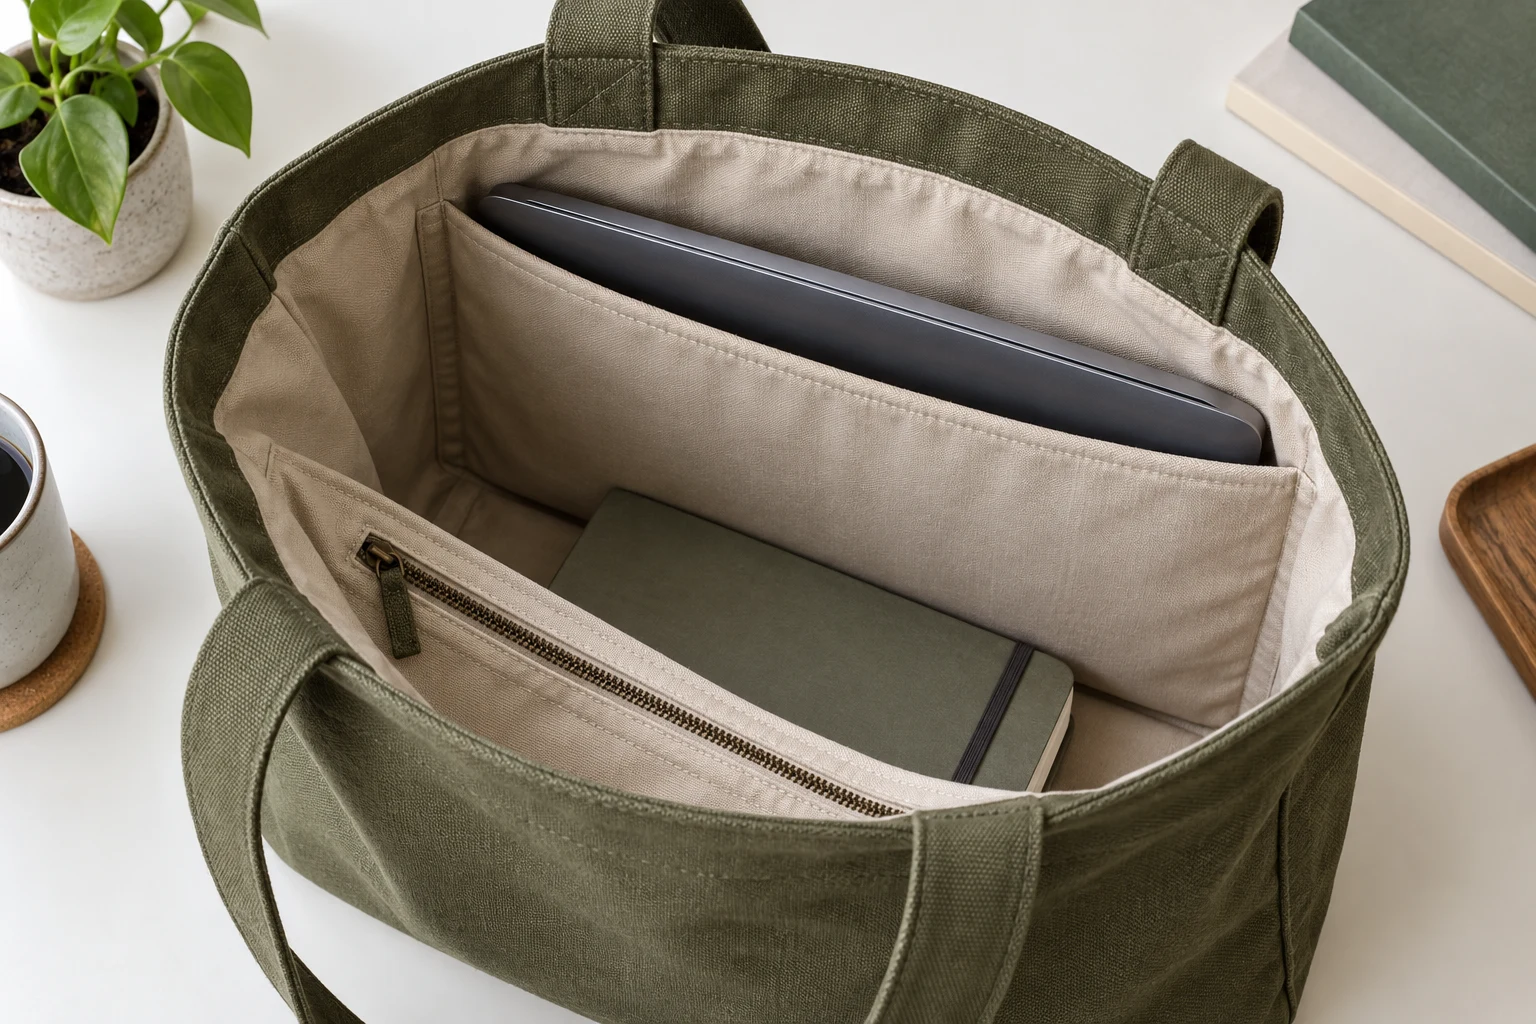
Assign each pocket a specific item or task. A quick-access pocket may suit a transit card; a zipped internal pocket may suit small items the user wants to keep enclosed. Confirm the pocket opening as well as its depth. A pocket can look large enough from the outside yet be awkward to reach or too narrow at its entrance.
For a bottle pocket, use the intended bottle dimensions and review how it sits when the main compartment is full. For a laptop divider, check whether the other contents press against it or prevent the main closure from working. Review the complete loaded bag, not each compartment in isolation.
The pattern and structure options are a useful starting point for discussing these choices together. Each added pocket should have a clear position, opening direction and purpose in the specification.
Compare closures against the way the bag is used
| Closure | What to consider | Sample check |
|---|---|---|
| Open top | Direct access, with contents remaining exposed | Check the opening and how contents sit during normal carry |
| Snap or magnetic closure | A closure point that may leave gaps at either side | Check alignment and whether a full load prevents it closing |
| Zipped top | More complete enclosure, with extra opening and construction details | Check usable opening width, zipper operation and access to larger items |
Choose the closure before finalizing the opening and pocket layout. A zip or recessed top panel can change how easily a large item enters the bag. No closure choice by itself establishes waterproofing, theft resistance or another performance claim. Describe the construction accurately and request evidence for any additional claim.
Match material and branding to the structure
Discuss the outer material, lining and any reinforcement as separate components. If the bag must stand upright for presentation, communicate that requirement and review a sample both empty and loaded. If it should fold for storage, demonstrate the desired folded state. A fabric name alone does not define either behavior.
Review material options with the target appearance, feel and care expectations in mind. Ask the supplier to identify the proposed material rather than approving only a general description such as canvas or nylon. Confirm any substitution before it is used in the final sample.
Place the logo on a drawing with finished dimensions and distances from seams or edges. Check the actual application on the sample, especially if it is close to a pocket or handle attachment. Do not assume a flat digital artwork preview shows how the logo will sit on a filled, curved bag.
Use a short design approval record
Keep a single specification revision and link it to the approved sample. Record measurements, construction decisions and unresolved items so purchasing and production teams are referring to the same design. A practical record should cover:
- Intended contents and carrying method.
- Finished width, height, depth and usable opening, with measurement points.
- Handle drop, width, material and attachment details.
- Pocket dimensions, positions and opening directions.
- Closure, lining, padding and reinforcement choices.
- Logo size, placement and application method.
- Agreed dimensional tolerances and acceptance checks.
- Final sample reference, approval date and any permitted substitutions.
Consider an illustrative work-tote brief: it must hold a particular laptop in its sleeve, one bottle, a charger and a notebook, and work for shoulder carry over a jacket. Those are reviewable tasks. The next step is to define measurements and evaluate a sample, rather than promise a universal tote size for every customer. This example is a planning exercise, not a tested MAZ Outdoor product specification.
Questions buyers often ask
What is the best size for a custom tote bag?
There is no single best size for every project. Start with the intended contents and carry method, define the finished measurements and opening, and check a sample with the actual items. Keep external size and usable internal space distinct.
Can I use the same design for hand and shoulder carry?
You can propose dual-use handles or separate handle options, but confirm the result on a loaded sample. Review shoulder clearance, hand-carry position and comfort with the intended user and clothing rather than relying only on total handle length.
Should I approve the logo before the bag construction?
You can prepare artwork early, but confirm its final placement against the agreed construction. Changes to a pocket, seam or handle position can affect the available branding area. Approve the finished application on the relevant sample version.
Turn the design into a supplier brief
For a useful custom tote bag design discussion, send reference images, an intended-contents list, measurement sketches and your priorities for carrying, access and branding. Mark unresolved decisions clearly so the supplier can propose alternatives without changing essential requirements.
Once the design direction is clear, use our custom bag quote checklist to organize quantities, packaging and timing. Then send your tote bag project brief to MAZ Outdoor for a review of the proposed structure and sample scope.
Article images are AI-generated illustrations of generic designs, not photographs of a specific MAZ Outdoor product or evidence of tested performance.